Enable Development Mode
Development mode enables rapid reporting and instant translation updates. Each device installation generates a unique Client ID that must be registered.
Additionally, Development Mode enables Preview Translation, allowing you to preview saved translations before publishing them.
Step 1: Get Your Client ID
The Client ID is automatically generated when the SDK initializes. You can find it in the console logs after running your app.
- Run your app in Xcode
- In the console output, filter by
Client ID - Look for a line similar to:
Client ID: fa78f73b-625f-4805-91af-e64939b43b05
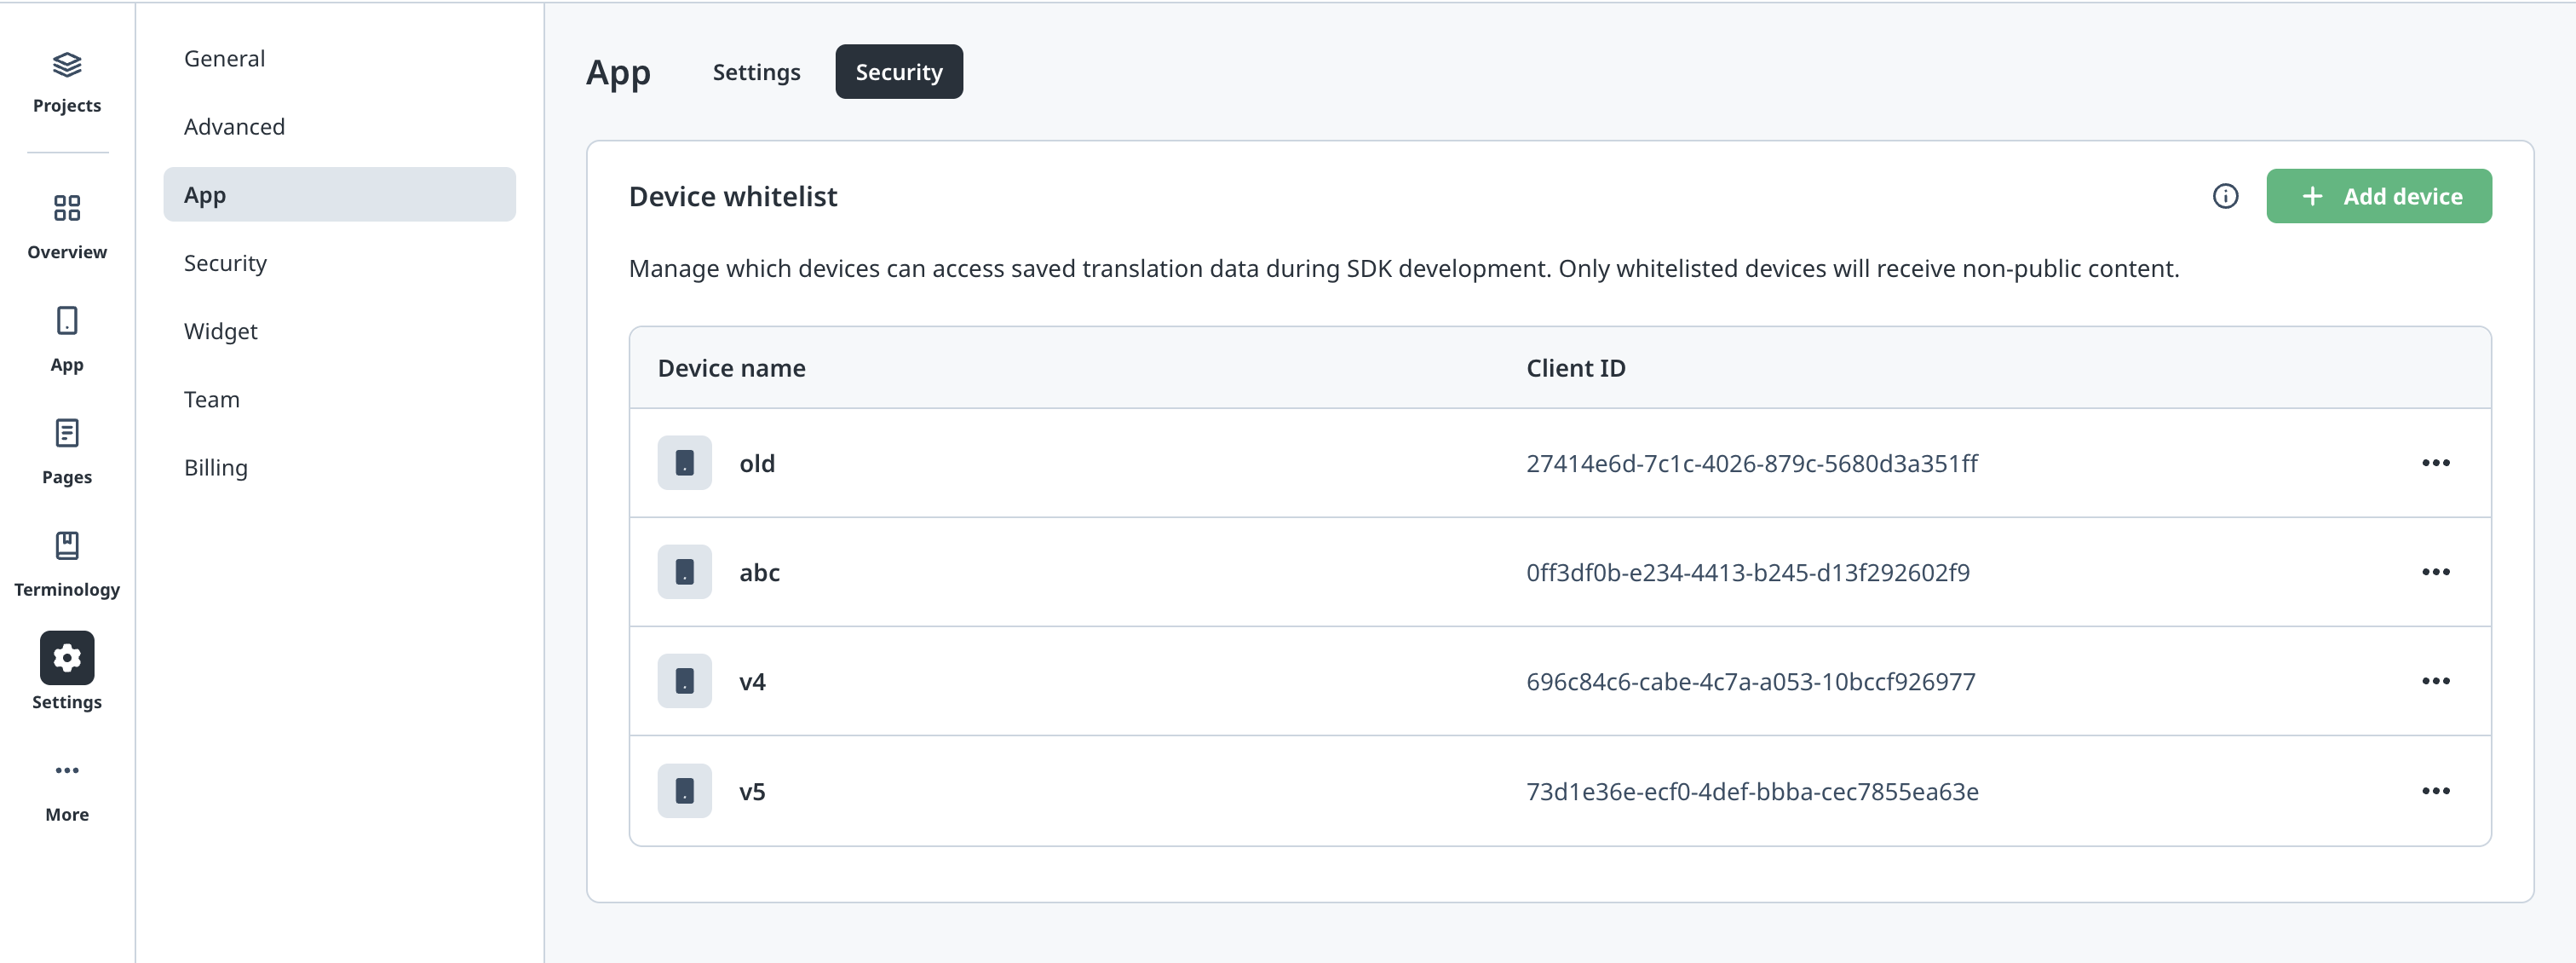
Step 2: Register Your Client ID
- Open the WOVN Dashboard
- Navigate to your project
- Go to Settings → App → Security
- Click Add Device and enter your Client ID
Step 3: Verify Development Mode Activation
After registering your Client ID:
-
Wait 2-3 minutes for the changes to take effect on the server
-
Rerun your application
-
Filter the console logs by
Is development mode -
You should now see:
Is development mode: true
Step 4: Verify Reported Texts
Once development mode is active, your app will automatically report newly detected texts to the WOVN Dashboard. To verify this functionality:
- Navigate through your app to display various text elements
- Open the WOVN Dashboard and check for newly reported texts
- The reported texts should appear in your project's text management section
It may take 2-3 minutes for the server to process reported texts and display them in the dashboard.
Important Notes
- Client ID Reset: The Client ID will change each time you delete and reinstall the app, or install on a new device. You'll need to register the new Client ID in the dashboard.
- Log Level: Ensure the
loglevelin yourWOVNswift.plistfile is set to0to display all log information, including development mode status and Client ID. - Activation Delay: It may take 2-3 minutes for Client ID registration changes in the dashboard to affect your app.